Have nothing in your houses that you do not know to be useful or believe to be beautiful. -William Morris
Unfortunately for most homeowners, organization doesn’t always come naturally, and it certainly is far away from the realm of style and interior design. But it doesn’t have to be! Organizational systems can be just a beautiful and stylish as other areas in your home while still being functional, and one of the easiest ways to get organized in style is by using a cork board (or even more than one!). Plus, cork is an easy material to work with, meaning there are tons of customizable options for display and design, not to mention the hundreds of DIY cork board projects we found. So let your inner interior designer shine as you also work out some storage and organization solutions.
Why Cork Boards?

Still wondering why to start with cork boards? While they might seem plain and boring, here are the reasons we’ve come up with that prove cork boards are stylish solutions for your organizational problems:
- Cork boards are endlessly reusable, no matter how much you pin and repin
- Cork is an ecofriendly material; it can be harvested every 9 years from a cork tree without hurting the tree at all
- While the look of cork is timeless and can be incorporated into almost any style, cork can also be easily shaped and painted if need be
- Cork is lightweight and easily moveable, so it won’t damage your walls
- Cork boards can keep your clutter off your desk and in your line of vision, helping you remember to take care of important tasks and items
- Cork boards allow you to change things out as often as you need to, with little to no fuss
Still not convinced? Look no further for cork-themed, stylish, unique, organizational inspiration:
Cork Boards in all Shapes…

Squares: Instead of the plain, boring rectangle, try finding thinner cork tiles and displaying four of them together. Not only will you still have a large space for pinning up notes and reminders, but keeping the four tiles close but not touching creates and display with visual interest. You can also use each tile for a different subject (to do versus reminders versus phone numbers, etc.).

Circles: For a different take on classic pinboards, shape your cork into circles instead of squares. You don’t lose much space for reminders but the style adds visual interest that classic squares might lack. For more fun, go with different sized circles (organize according to size or mix-and-match for a whimsical feel).

Other shapes: Ah, one of the best things about cork is the ease with which you can shape it yourself. Cork can be bought in various shapes or cut by hand - for a kid’s room, you can create footballs and/or butterflies easily, or for a more whimsical touch in an office, try clouds or any other shape you can think of.
...and Sizes

Small: For just a touch of cork, you can incorporate smaller strips into other organizational displays. Think about painting a section of your wall with chalkboard paint and then framing it with cork board strips - you’ll have space to write notes and pin up reminders both.

Large: Of course, you can go the opposite direction by incorporating large swatches of cork in an office or bedroom. For small office nooks within other spaces (kitchens, living rooms, bedrooms), think about covering a smaller accent wall behind the desk completely with cork for a way to distinguish the office area from the rest of the room while also giving yourself plenty of organizational space.
Inspired DIY Cork Board Projects

Painted: One of the great things about cork is that it can be easily painted! Use painter’s tape to create a zigzag pattern and paint the uncovered cork, or use circular stencils to paint a gold ‘confetti’ cork board display.

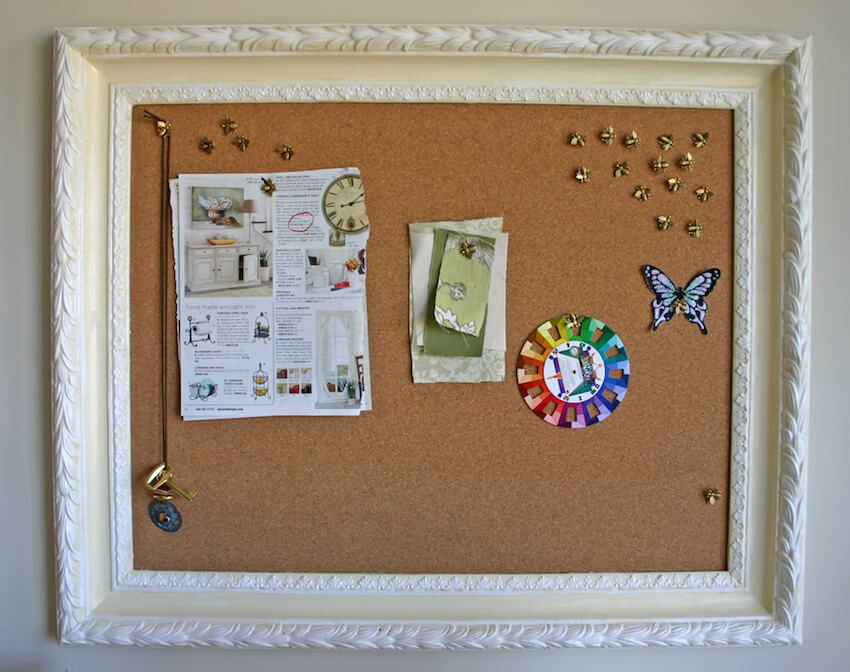
Framed: For a more elegant look, find a piece of cork board that fits in an ornate frame and display the piece as artwork, as well as for organization. Use a frame that matches the rest of your interior design.

Calendar: Cork boards are a great way to create changeable calendars - simply use washi tape or a sharpie to make the borders, and then pin date numbers or use stickers to label the days for a whole month or one week at a time. Pinned numbers allow you to move the numbers for each month, and you’ll stay organized all year!
Join the conversation